Plugins in nopCommerce
Plugins are a set of components adding specific capabilities to a nopCommerce store. Examples of plugins include payment modules, shipping rate computation methods and more. This section describes how to install plugins manually.
nopCommerce has a variety of plugins, expanding your store functions, on its marketplace. The plugins can be installed either by downloading from the marketplace or by accessing the storefront right from the admin panel.
The plugins on the marketplace can be sorted by category, version, name or rating, and are free or paid.
The plugins available on the marketplace are developed either by the nopCommerce team, solution partners or third party vendors.
Note
Plugins labelled "By nopCommerce team" are developed by the nopCommerce team and are distributed freely. Third-party services connectors are developed in the course of the technology partnership program, they are subject to nopCommerce premium support services and are also distributed freely.
To install a plugin
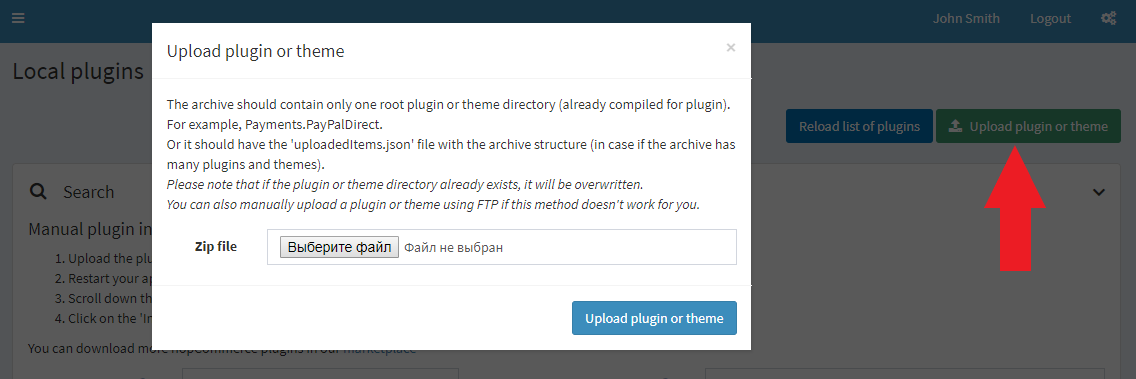
The user has two options for uploading the plugin. You can use any that seems most convenient:
- Upload the plugin to the
/pluginsfolder in your nopCommerce directory. And restart your application (or click Reload list of plugins button). - Upload the plugin or theme using the Upload plugin or theme button indicating the path to the location of the archive with the plugin in your local storage.
Tip
You can download more nopCommerce plugins on our extensions directory.
- Upload the plugin to the
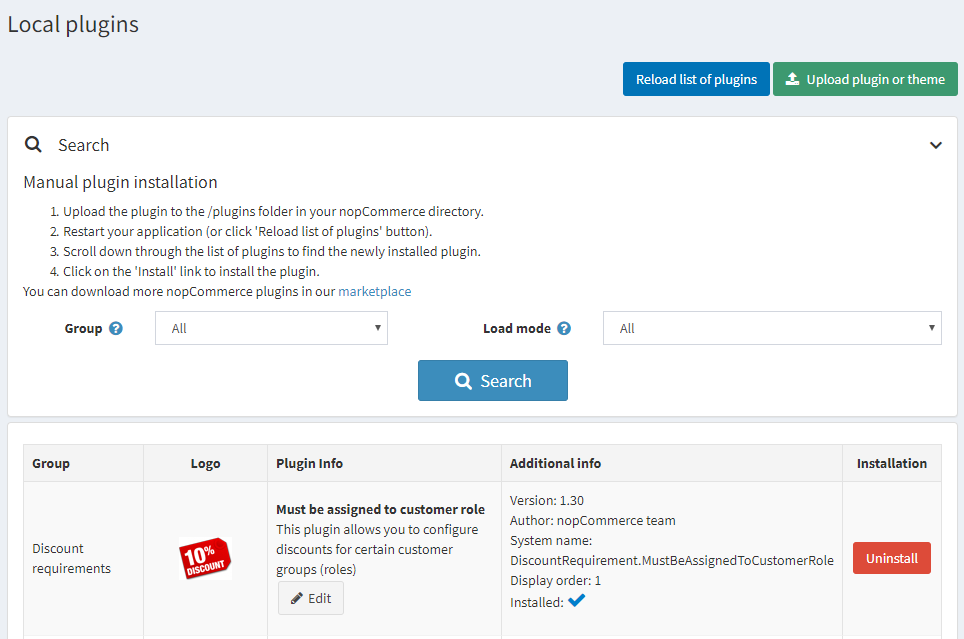
Scroll down through the list of plugins to find the newly installed plugin.
Click on the Install link to install the plugin.
Click on the Restart application to apply changes button on the top panel to finish the installation process.
The plugin is displayed in the plugins list (Configuration → Local plugins).
Note
If you're running nopCommerce in medium trust, then it's recommended to clear your
\Plugins\bin\directory.
To configure a plugin
- Go to Configuration → Local plugins. The plugins list is displayed:
- Click the Configure link beside the plugin to go to the plugin's configuration page. If the Configure button does not exist beside a plugin, this indicates the plugin does not require any configuration.
To change the plugin's friendly name, display order and limitations
- Go to Configuration → Local Plugins. The plugins list is displayed:
- Click the Edit button beside the plugin. Edit plugin details, as follows:
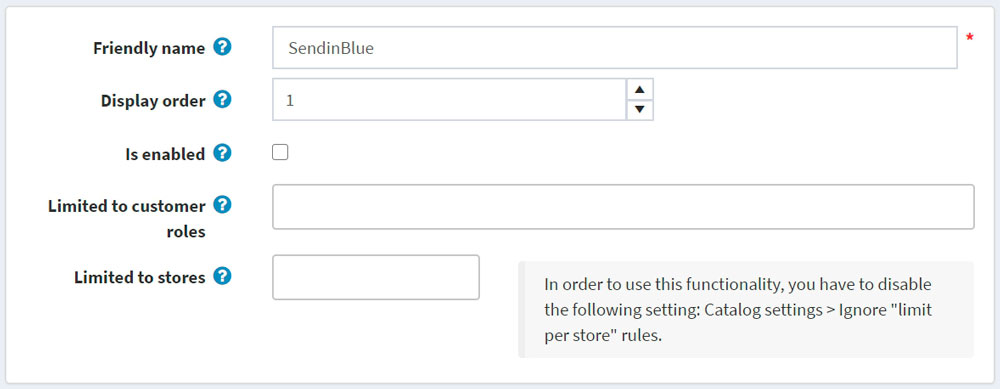
- Enter the Friendly name.
- In the Display order field, define the required location to display this plugin. 1 represents the top of the list.
- Tick the Is enabled field if you want to enable the plugin in the store.
- From the Limited to customer roles drop-down list choose roles you want to be able to use this plugin.
- In the Limited to stores field, define the stores in which the plugin will be used.
- Click Save at the top of the page.
To uninstall a plugin
- Go to Configuration → Local plugins. The plugins list is displayed:
- Click the Uninstall link beside the plugin to uninstall. The plugin is uninstalled. The link in the Installation column changes to Install enabling you to reinstall the plugin at any time.
- Click on the Restart application to apply changes button on the top panel to finish the uninstallation process.