Shopping carts and wishlists
The "Shopping carts and wishlists" section enables store owners to view all the existing shopping carts and wishlists of all the customers and from all stores on one page. To access this page go to Sales → Shopping carts and wishlists.
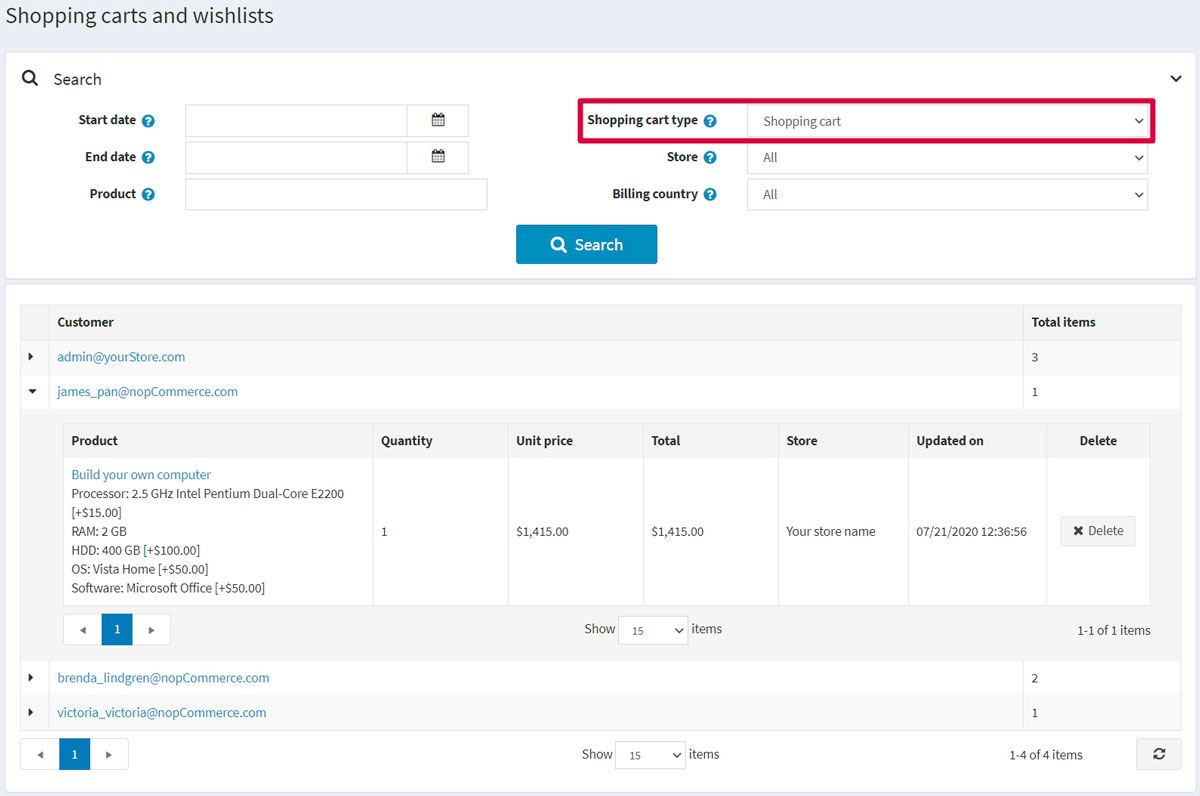
In the Search area in the top of the page select the desired Shopping cart type: Shopping cart or Wishlist.
You can expand the products by clicking the following icon in the first column: ![]() .
.
From the list, you can proceed to the customer details page by clicking on the customer link. You can also visit the edit product details page by clicking on the name of the product or delete the product from cart by clicking the Delete button.
Shopping cart
Select the Shopping cart from the Shopping cart type dropdown list on the Sales → Shopping carts and wishlists and click Search to view the shopping cart list. This list ontains all products that were placed in carts, but not purchased.
The following screenshot shows how a customer sees a shopping cart page in the public store:

There are a few elements on the shopping cart page. Some of them can be disabled if needed:
- The Update shopping cart button allows a customer to change a product's quantity by entering the appropriate number in the Qty field or remove a product by ticking the Remove checkbox.
- The Continue shopping button allows a customer to proceed to the catalog.
- The Estimate shipping button allows a customer to estimate shipping. After clicking this button the following popup window will be displayed:
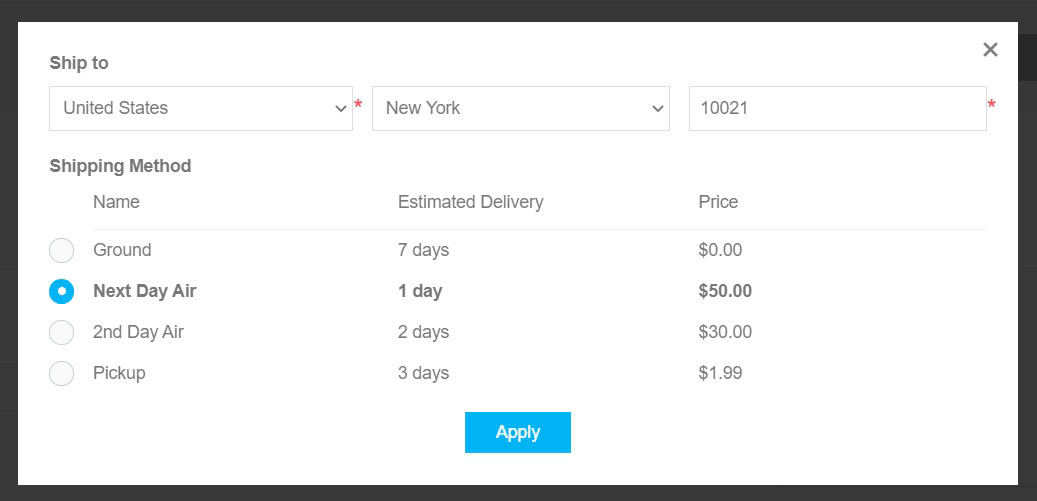 In this window, the customer can enter the shipping address and see the appropriate shipping options.
You can disable shipping estimation on the shopping cart page by unticking the Estimate shipping enabled (cart page) checkbox on the Configuration → Settings → Shipping settings page.
In this window, the customer can enter the shipping address and see the appropriate shipping options.
You can disable shipping estimation on the shopping cart page by unticking the Estimate shipping enabled (cart page) checkbox on the Configuration → Settings → Shipping settings page. - You can see the Gift wrapping dropdown on the shopping cart screenshot provided above. This is a checkout attribute. Read more how to manage checkout attributes in the Checkout attributes chapter.
- The Discount code section allows a customer to enter a discount code. You can disable this by unticking the Show discount box checkbox on the Configuration → Settings → Shopping cart settings page. Read more about discounts in the Discounts chapter.
- The Gift cards section allows a customer to use a gift card. You can disable this by unticking the Show gift card box checkbox on the Configuration → Settings → Shopping cart settings page. Read more about gift cards in the Gift cards chapter.
- In the shopping cart totals section a customer sees the shipping fee. Read how to set up shipping in the Configure shipping section.
- In the same section a customer sees the tax info. Read how to set up tax in the Configure taxes section.
- In the same section a customer sees how many reward points will be earned. Read how to set up reward points in the Reward points section.
- In the same section a customer sees terms of service. You can disable this by unticking the Terms of service (shopping cart page) checkbox on the Configuration → Settings → Order settings page.
Note
In case you don't want allow a customer to add a certain product to a shopping cart tick the Disable buy button checkbox in the Prices panel of the product edit page. Read more about adding a product in the Add products chapter.
Note
Check out our marketplace for plugins that help you manage abandoned carts and recover lost sales.
Wishlist
Select the Wishlist option from the Shopping cart type dropdown list on the Sales → Shopping carts and wishlists page and click Search to view the wishlists.
A wishlist is a list of products that a customer can share with friends, or save to transfer to the cart later. If a wishlist adding is enabled for a product, the Add to wishlist button appears on the product details page in the public store. When a product of different variants is added to a wish list, all of the variants chosen by a customer are included in the wishlist.
Tip
For example, if a customer adds the same shirt, but in 2 different colors, each shirt appears as a separate item in the wish list. In case the customer adds the same product to the wishlist multiple times, the product appears only once, but with an updated quantity that reflects the number of times the product was added.
The following screenshot illustrates how a customer sees a wishlist page in the public store:
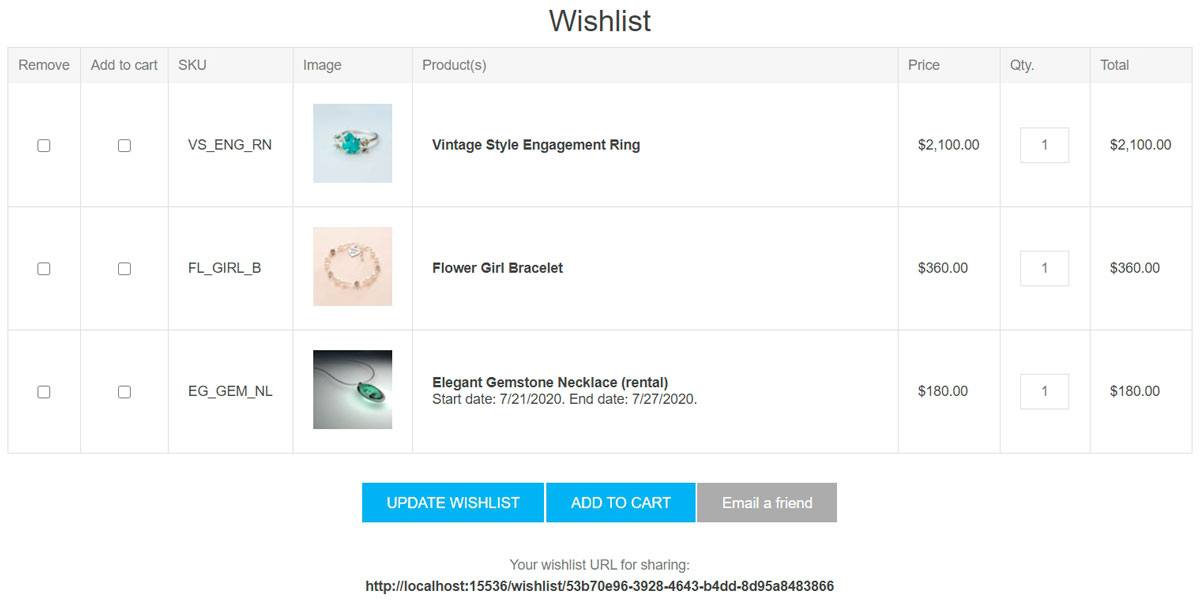
There are a few elements on the wishlist page:
- The Update wishlist button allows a customer to change a product's quantity by entering the appropriate number in the Qty field or remove a product by ticking the Remove checkbox.
- The Add to cart button allows a customer to add the selected products to cart.
- The Email a friend button allows a customer to send the wishlist to a friend by email. You can disable this by unticking the Allow customers to email their wishlists checkbox on the Configuration → Settings → Shopping cart settings page.
- The Your wishlist URL for sharing allows a customer to share the wishlist.
Note
In case you don't want allow a customer to add a certain product to a wishlist tick the Disable wishlist button checkbox in the Prices panel of the product edit page. Read more about adding a product in the Add products chapter.
Shopping cart and wishlist settings
To change the shopping cart and wishlist settings go to the Configuration → Settings → Shopping cart settings page.
This page enables multi-store configuration, it means that the same settings can be defined for all stores, or differ from store to store. If you want to manage settings for a certain store, choose its name from multi-store configuration drop-down list and tick all needed checkboxes at the left side to set custom value for them. For further details refer to Multi-store.
Common
In the Common panel you can define:
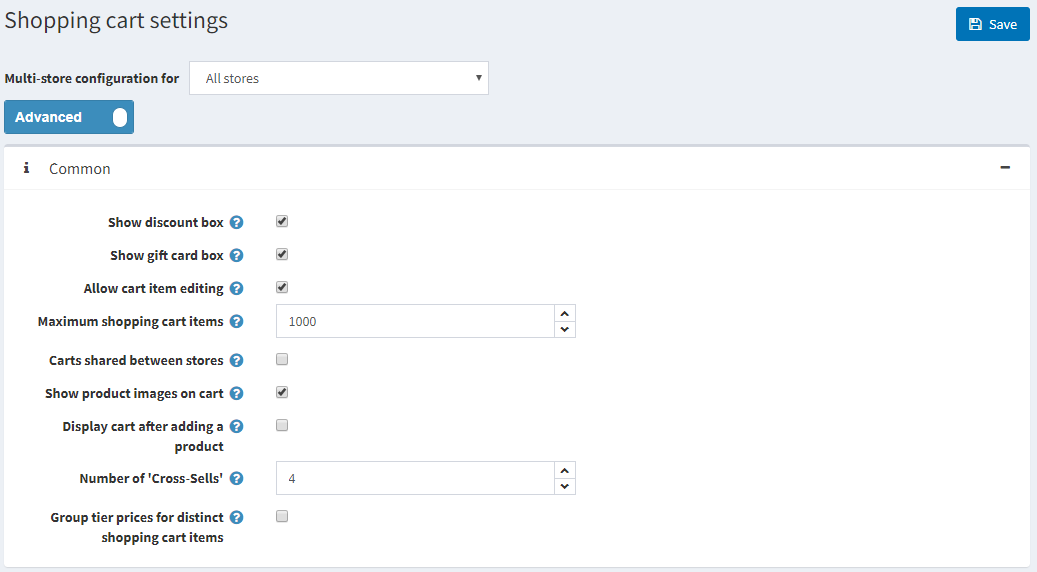
- To Show discount box displaying the discount coupon box on the shopping cart page.
- To Show gift card box displaying the gift card box on the shopping cart page.
- To Allow cart item editing, to enable customers to edit items in the cart. This feature is useful when products have values entered by customers.
- Maximum shopping cart items - the maximum number of products allowed to be added to the shopping cart.
- Select the Carts shared between stores checkbox to share shopping carts (and wishlists) between stores.
- To Show product images on cart, to display product images in the store shopping carts.
- To Display cart after adding a product, to the display the shopping cart page immediately after a product is added to the cart. When this checkbox is unticked, the customer will remain on the page where the product was added to the cart.
- Number of cross-sells that you want to display on the checkout page of the shopping cart in the public store. Enter 0, if you do not want to display cross-sells.
Mini shopping cart
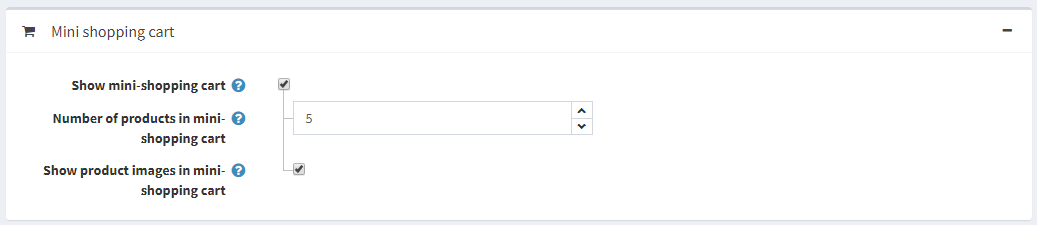
In the Mini shopping cart panel you can define:
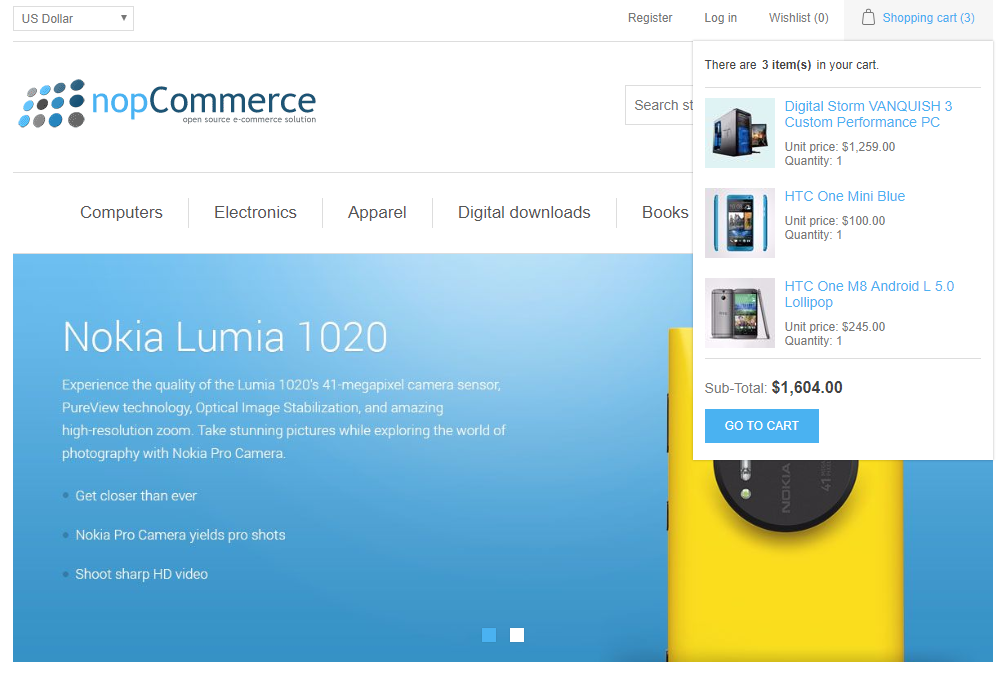
- To Show mini-shopping cart - a drop down menu, that appears at the top right-hand corner of the main window, when hovering over the "Shopping cart" link, as shown below:
 When this field is ticked the following fields are displayed:
- Number of products in mini-shopping cart - the maximum number of products displayed in the mini shopping cart dropdown menu, in the public store.
- Show product images in mini shopping cart to determine whether images are displayed in the mini shopping cart dropdown menu.
Wishlist
In the Wishlist panel you can define:
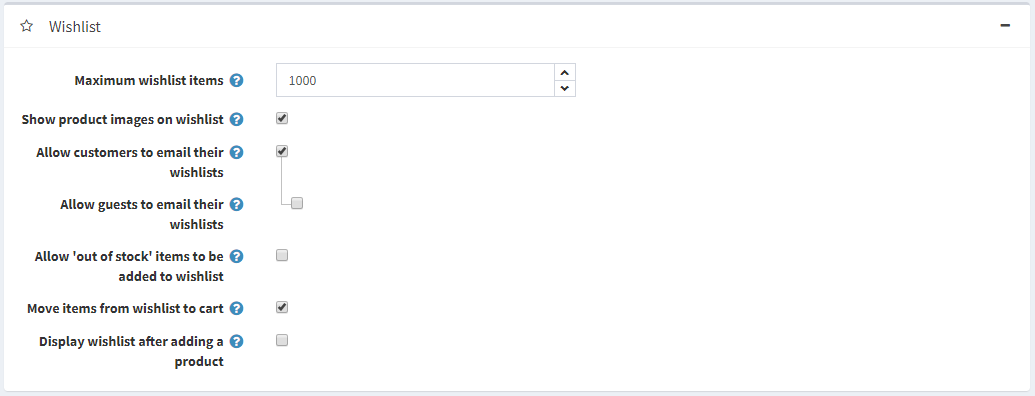
- Maximum wishlist items - the maximum number of different products allowed to be added to the wishlist.
- To Show product images on wishlist, to display product images in customers' wishlists.
- To Allow customers to email their wishlist to friends. When this field is enabled the following field is displayed:
- Allow guests to email their wishlist to friends.
- To Allow 'out of stock' items to be added to the wishlist.
- Select the Move items from wishlist to cart checkbox to move products from wishlist to the cart when clicking "Add to cart" button. Otherwise, they are copied.
- To Display wishlist after adding a product, to display the wishlist page immediately after a product is added to the wishlist. When this checkbox is unticked, the customer will remain on the page where the product was added to the wishlist.