Email campaigns
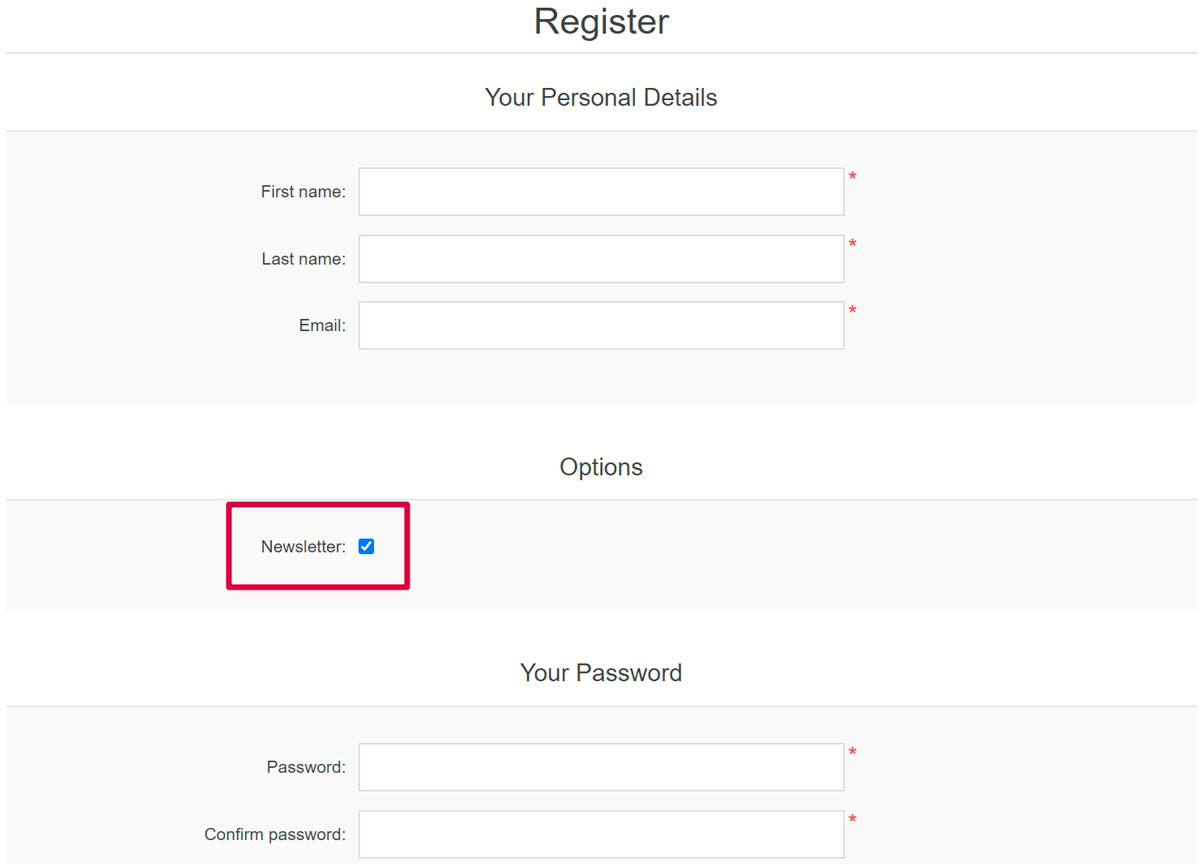
During registration, a customer can select the Newsletter option to receive newsletters from your store. Or it's possible to subscribe to a newsletter lately using the form in the footer (in the Default Clean nopCommerce theme). The other way of filling in email subscribers is to import list of subscribers from an external CSV file to nopCommerce. As well as you can export the list of subscribers to an external CSV file from nopCommerce.
See how to manage newsletter subscribers in the Newsletter subscribers section below.
Use your subscribers list to create email campaigns to easily and quickly reach the target audience without any additional marketing activities. Campaigns help to promote trust and loyalty to a company while also increasing sales.
There are several examples of email marketing campaigns you can use for your store: start with a welcome email that thanks for the subscription, regularly send out announcements, news regarding your company, coupons for future purchasing and much more.
Note
There are no campaigns available by default, so you can create them from scratch in order to follow your own marketing strategy.
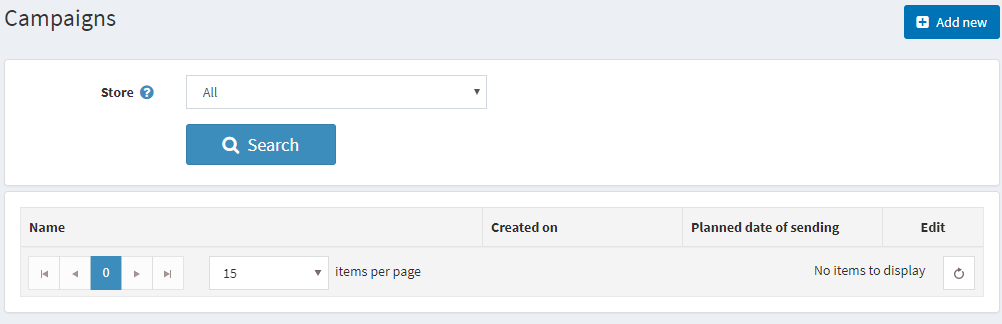
To manage campaigns go to Promotions → Campaigns.
Add a new email campaign
To create a new campaign click Add new.
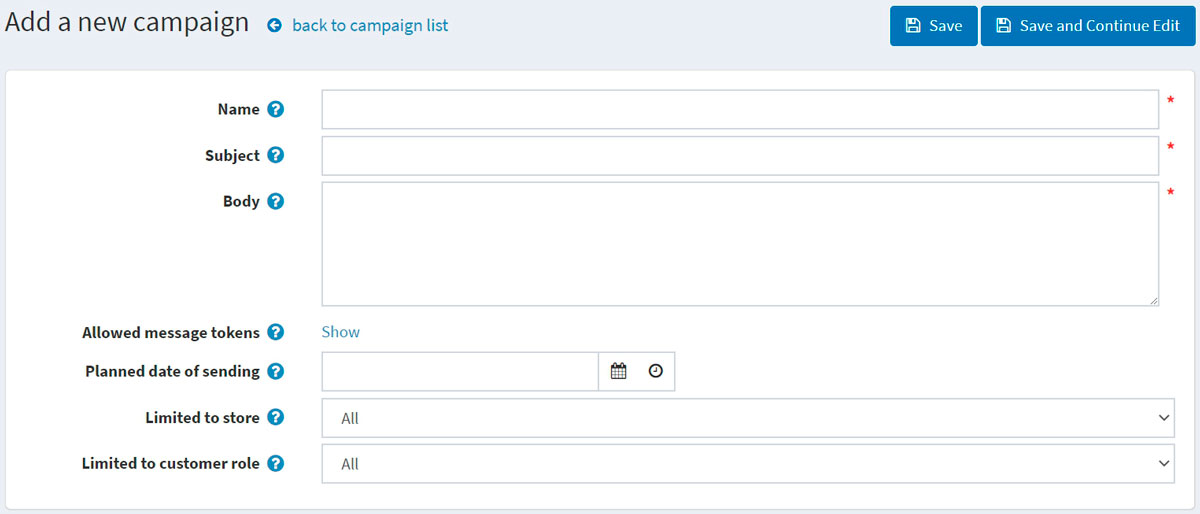
Define the following campaign details:
- Campaign Name.
- Subject of the campaign.
- Enter the Body text of the email you want to send out.
- In the Allowed message tokens you can see the list of allowed message tokens you can use in your email campaign. You can see all of them if click Show.
- Enter the Planned date of sending and time.
- From the Limited to store dropdown list, select the store which subscribers will get this email.
- From the Limited to customer role dropdown list, select the roles of subscribers which will receive this email.
Click Save or Save and continue editing to proceed to send your campaign.
Send the campaign
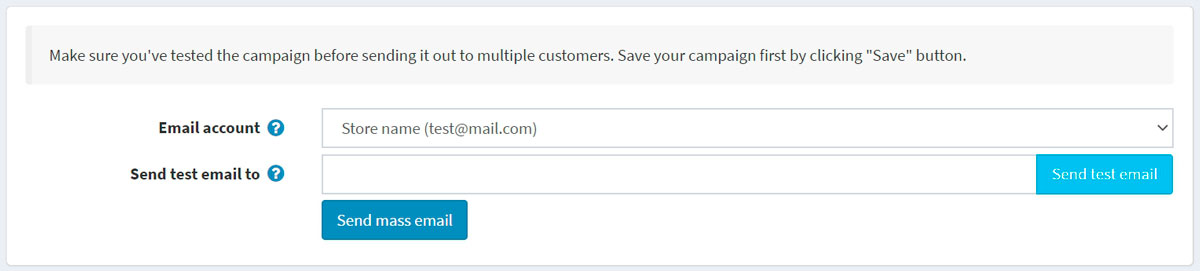
After the campaign is saved you can send your campaign to customers. You will see the new panel in the top of the page:
Note
Make sure you've tested the campaign before sending it out to multiple customers.
First of all send a test email to check if everything is done properly. To do this choose the Email account which will be used to send the campaign. See how to create an email account in the Email accounts section.
Then enter your email address in the Send test email to field and click Send test email.
After you make sure that everything is OK send your campaign to customers using the Send mass email button.
Newsletter subscribers
During registration, a customer can select the Newsletter option to receive a newsletter from your store:
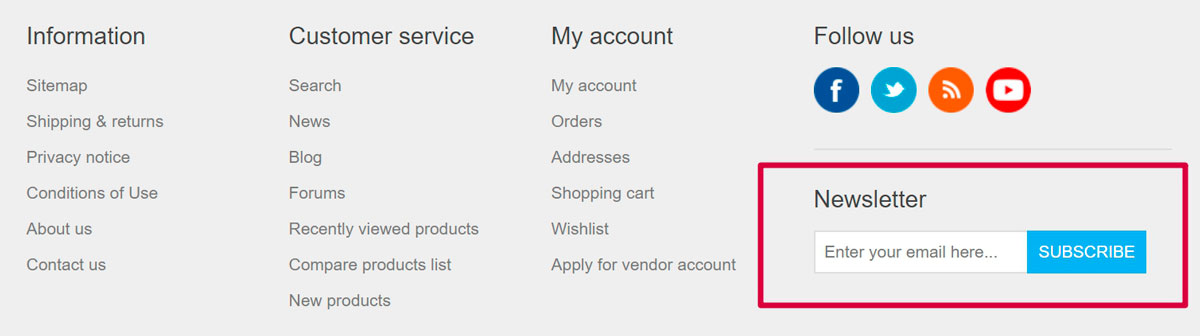
Or it's possible to subscribe to a newsletter lately using the form in the footer (in the Default Clean nopCommerce theme):
The other way of filling in email subscribers is to import list of subscribers from an external CSV file to nopCommerce. As well as you can export the list of subscribers to an external CSV file from nopCommerce.
To export/import newsletter subscribers go to Promotions → Newsletter subscribers.
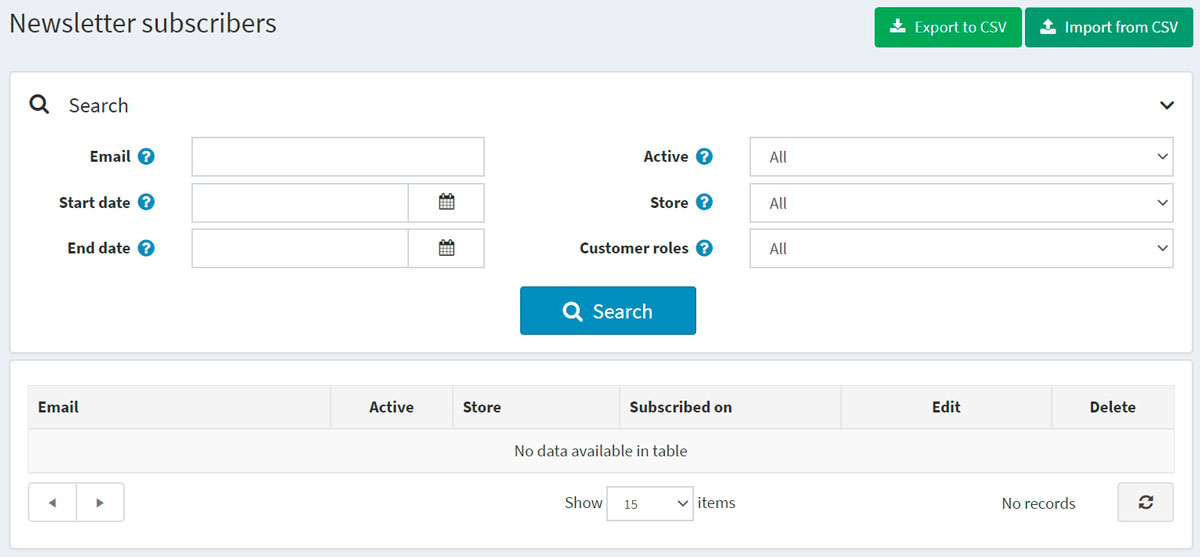
You can click Import from CSV to import subscriber lists in CSV format. Ensure that each line of the CSV file is in the following format: email_address, is_active, store_id (store_id parameter is optional). For example, test@test.com, true. You can click Export to CSV to export the existing subscriber list.
Searching for the subscribers
On the Newsletter subscribers page you can find certain subscribers using the following fields for search:
- Enter the Email of the subscriber to find, or leave this field empty to load all the newsletter subscribers registered in the system.
- Specify Start date and End date when a customer was subscribed.
- From the Active dropdown list, choose between Active and Not active subscribers or load All.
- From the Store dropdown list, choose the store.
- From the Customer roles dropdown list, select the customer role.
Click Search.